Tutorials
/ ASP.NET MVC Razor
/ Custom Snap-In implementation
Custom Snap-In implementation
In This Topic
Overview
Snap-Ins are very powerful interface elements that can be used for various purposes. DocuVieware™ comes with several handy built-in snap-ins such as the Thumbnails, Bookmarks, Text Search or Annotations palette.
This tutorial shows how to create a very simple Custom Snap-In with a button that will trigger a Custom Action server-side to return a message.
You are going to implement a Custom Snap-In that will contain a simple button which action will be to send a "ping" command to the server and it will reply with a "pong" message.
DocuVieware™ requires .NET Framework 4.6 or above.
The screenshots have been taken using Visual Studio 2015 and GdPicture.NET™ 14, it may differ from the current release.
Preparing the Custom Snap-In content
Step 1: Add mandatory imports you will need in the Index.cshtml view file.
Step 2: Implement an utility function that converts a .NET Color object to an hexadecimal value you can actually use in HTML.
Step 3: Build the content of the Custom Snap-In and add it to the DocuVieware™ control between its declaration and the rendering, like this:
Step 4: Add the JavaScript function called on the snap-in button click event that will trigger the custom action, like this:
Handling your action server side
As seen in the Client/Server coming and going with Custom Actions tutorial, you are going to implement a simple custom action that will process the snap-in button click event.
All you need to do now is add the custom action event handler in the Global.asax.cs file like this:
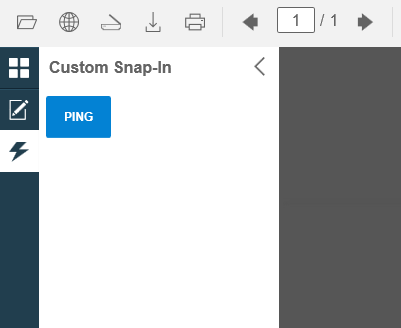
Compile and start the page, the custom Snap-In icon will appear in the left panel.

Now, if you select it and click on the ping button, it will trigger the custom action and you should see a "Pong" message coming back from the server.
See Also
